Thursday, August 18, 2011

3T THURSDAY

Ok so at least it's a "T" day- right?!!

SO much going on this week with getting back from our one and a half month trip at the trailer (miss you all!!), payroll week for our business, plus this weekend we are having a yard sale with our neighbour (if you're in the Oshawa area send me a message and I'll tell you where to find us so you can check it out!).  If that isn't enough, today is my youngest (Ben's) birthday, tomorrow is Al's and my Anniversary, and we have company coming this weekend for more crazy events going on!  Phew- anyone else tired?  Here is a picture of our darling Benjamin- he was so excited to have us sing Happy Birthday to him today- he turned 2 so really he doesn't have any memory of other birthdays.  His eyes just lit up when we brought out the cake with candles, and also when he got to open our gifts!  What a sweetie!  These balloons are compliments of Auntie Leanne, Uncle Brad, cousins Jacqueline, Victoria and Olivia (love you guys!!!).  They are out in BC and every birthday they send our kids a balloon bouquet.  They are AWESOME.  Here is Ben with his:


Isn't he the cutest?!

OK- onto scrapbooking!!  As promised I am going to focus on flip flaps.

What are flip flaps?  Well- they are basically memory protectors (page protectors) for pictures BUT you can use them to add more pictures (or journalling) to your layout.

I don't have any that are empty to post a picture- you can see them on page 122 of the Idea Book.  They come in different sizes but I have just used the 4x6 as frankly usually that is how I print my pictures so that is what I work with.

When you see them they look like a photo sleeve made from a memory protector but they have an added flap which has an adhesive covered in a paper.  That way you can stick it to your layout the same way you close one of those self stick envelopes.

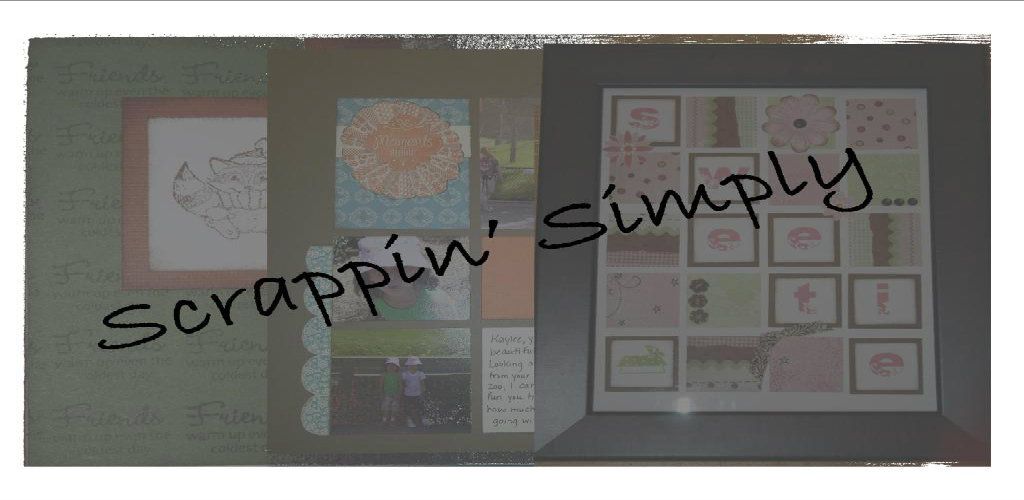
So here is what it would look like on a layout with it closed.  Both the pictures on the page (left page layout) use the flip flaps.  The one at the top will open to the side, the bottom one will open up. 


So- now to show you what it would look like with the flaps open


I opened them both and took a picture for you- so that picture on the top left instead of having 1 photo now has 3 (one on the mat and 2 in the flip flap- the journalling you are seeing is from the 2nd page of the layout).  The same with the picture on the bottom.  So 2 pictures become 6- AMAZING!  And if you are trigger happy with the camera like me, you need those extra spots.  But you just get so many fun pictures that way.  So you can have your nice behaved children in the layout- but hidden you can also have your crazy pictures! LOL

Here is the 2nd page which goes with the 1st (after all- you can't really just have a 1 page layout in a book, can you?!)


HUH- I apologize for that- although my picture is turned the right way- I guess blogspot wanted to give your little neck a stretch after all this reading so turned it on the side.  So just to even yourself out, ensure you stretch your head to the other side as well and continue on!

Here is another example of a layout using the flip flaps.  Now- while I was working on this, my girlfriend, Jacque, wanted to use 4.  This created a bit of trouble- to understand that first I'll give a little training session in how to use the flip flaps.

When you decide on an area you want to us it, the best thing I have found to do is measure out where your mat or photo will go that will be attached to the layout.  Then slide the "flap" with the adhesive under that to ensure it will be covered, you have it bending the right way and all that stuff.  Then, when you are happy, attach the adhesive flap first, then the layout picture over top.  That way it will be extra stuck down (that is the technical term so be sure to use it) and also you won't have a line through your photo or on your layout from the flap.

When you are ready to put your page in your memory protector, you put the page in, then mark with a pencil or pen the line where the edge of the flip flap is (the side where it opens from- right near where the bend is to open it).  Then TAKE YOUR LAYOUT out- get a small whole punch and make a hole at each end of the line on your memory protector where the flip flap will end (again I'm only talking the side where it attaches to the layout).  Ensure you have a cutting board or mat INSIDE your memory protector so you don't cut through both sides.  Then take a ruler and your knife and cut along the line from hole to hole.  The holes prevent the memory protector from tearing.  Then you put your page in, pull the protector as wide as you can and feed the flip flap through your cut.  Once through, you don't even notice it!!

SOOOOO- now that you know how to do that- the issue being when you put 4 photos in flip flaps all the same size as your layout photo so that they each open out is that when you put your 4 lines, you will end up cutting out a square of your memory protector.

How we got around this is she put a mat down that was a bit larger than her 4x6 flip flaps.  So it was 5x7.  Or whatever size- you get the idea.  She may have used a 5x7 photo in there but if you only print 4x6 that is fine, you just have a larger mat around your layout picture.  Then when she did her 4 flip flaps, there was some memory protector in between each one.  NOW- that being said- it was NOT easy to feed all those babies through the slits knowing there wasn't a lot of room if she was to tear her memory protector.  So be careful- and use that method sparingly.

Here is what my 2nd layout looked like closed (sorry didn't take any pictures of Jacque's so you're stuck with my fewer flip flaps :) )


And here is what this puppy looked like open:


I just love how I can incorporate so many pictures.  Here is a close up of the top picture open so you can see what it looks like with the matting and maybe see where the flip flaps are attached underneath

So there you have it- flip flaps!! I hope you'll give them a try- I'm sure you'll love them.  If you need any help figuring out how to use them or any questions post me a comment and I'd be happy to give you a hand!

Until next time... Happy Scrappin'!

Wednesday, August 17, 2011

Technique- Stamp Kissing

Looking for a new stamping technique to try?  Check out Jeanette Lynton, from Close to my Heart, for some great ideas.  You can go to her blog here.

Stamp Kissing is when you take your inked stamp and push it or "kiss" it against something else so that you can get a different image or texture on the stamp.  You can use a background stamp, some ribbon you have, scrap paper or anything that has either a raised or an indented image.

She has lots of ideas I haven't heard of before so even if you are familiar with the technique, check it out!

Then be sure to try it out yourself!  Have fun and Happy Scrappin'!

Tuesday, August 16, 2011

3 T Tuesday....not again!!

Hi there!
I'm sure you have been on the edge of your seats waiting for my 3T post.  Good news is, all my family is back in one place-we are back home from the trailer.. and it's payroll week... and my reader went all funky on me today which involved an hour long online chat with Sony- it wasn't pretty- there was a lot of frustration on my part- but a very friendly and helpful staff worked with me.  Still issue is NOT solved- I am VERY sad as my book is there- wanting to be read. But I can't get it onto my reader because I'm not authorized.  Sigh.

Anyhow- that chat meant kids bed time was late which that meant the payroll I was supposed to be working on tonight got pushed back.., you see where I'm going with this!

Yup- life got in the way!  Maybe I should call it 3T sometime during the week instead?  What do you think? 

So I will post tomorrow- be sure to check back as I'm going to talk about our flip flaps.  One of those odd birds that is in the catalogue and you think "Huh, that sounds neat" but really can't picture it.  Well... I have pictures to help!  They are AMAZING!  Not new- but any scrapbookers best friend!  Especially for trigger happy people like me who take multiple pictures of the same shot.  Gotta love digital!!

Anyway- until tomorrow.... Happy Scrappin'!

Friday, August 12, 2011

Scrappin' Simply Spotlight- Fabulously Artsy!!

Hi all!
So Kaylee and I are now back at home- Al, Ben and Connor will be joining us on Monday.  It's great to be home again- hot water, a large shower and bed.  But with that also comes the little messes that need to be cleaned up and all the stuff around here I've been wanting to do and haven't yet done.  So... I'm glad to be home... but a little sad too. 

The very exciting part is tomorrow we are having a CTMH Team Meeting- it's always so great to get together with other consultants- so inspiring!

Speaking of inspiring, I have an AMAZING person to tell you about for the Spotlight this week (hey, do you like that segue?  That was not planned at all- gotta love it when stuff just works out! :) )

The blog I am spotlighting I have been following for some time.  She is such an incredibly talented lady.  She is so amazing at sharing her creativity as well- creating videos and tutorials.  She really is someone you MUST follow if you are not already! 

Without further adieu,  you need to check out Tresa Black who is Fabulously Artsy

She won 1st place at our CTMH convention for the best album contest.  On her blog you can connect to a video she made of the album- YOU HAVE GOT TO CHECK THIS OUT.  It is honestly the most amazing album I have ever seen.  I was almost in tears watching this.  What an amazing thing to create- and what an incredible thing to leave for her children.  See the post here.  And be sure to start following her today- you will never be short of inspiration if you do!

Until next time... happy Scrappin'!

Wednesday, August 10, 2011

3 T Tuesday.... ah Wednesday?!

Well- doesn't life always get in the way of best intentions?!  As I told you this week, one of my regular posts was going to be my 3T Tuesdays where I would post info on new tools or products, on Tips or Techniques.  And last night, during the time I had scheduled in my brain to do this, suddenly our 2 year old started throwing up and came down with a fever.  Not a huge deal with our other 2 kids... but for Ben it often means a seizure and a check up in the ER.  And did I mention, yup, we're still at the trailer... 25 minutes from the hospital.

So- instead Al took him for a trip to Granny's place and all plans for my blogging flew out of my brain.

I was hoping that my post showing you Kelly's great technique idea would get you all through to today!  So... here goes with the 3 T T-Wednesday :)

I think I have mention oh only a few times that the new Idea Book is now out and I am SO darn excited!!  There are so many great changes and new products.

One of those who you would know about already if you follow any other CTMH blog is the new pairing with CTMH and Cricut.  Now you can order a Cricut cartridge which has 700 images, 3 stamp sets which pair with the cartridge and 3 pages of dimensional elements (tags, mixed shapes and banners) all for only $109.95!  Alas... I do not OWN a Cricut so you will not see samples on my blog. BUT if you want to see some, you can go to any of those listed that I follow as I think every other consultant I know does! :)  You can also see the images and info on the CTMH website here.

What I CAN show is you one of my favourite new embellishments.  As you may be able to tell from my blog, I LOVE butterflies!!  Too cute!  And these new embellishments are great- you get 68 butterflies with the Just Blooms Paper Shapes Flutter Paper Shapes for only $6.50!  You can decorate them with other embellishments like our Sparkles, our Opaques Adhesive Gems (all of which already have the adhesive on them and are SO easy to use!), or even some brads (and who doesn't love to use a brad?!).  You could also ink up the butterflies to have them incorporate with your page or card.  SO many great things to do, so little time!

These babies also come with one of the Workshop on the Go kits now available- the Elemental Kit!  This is a must have for me- LOVE it.  But frankly most of them are! This kit comes with the Level 2 package of Elemental paper (6 pages of patterned paper- 2 of each of 3 double sided designs card stock weight plus 6 sheets of cardstock), 1 My Acrylix Stamp set only available with this set, the Flutter Paper shapes, 1 pkg of Antiqued Copper Designer Brads and the Instructional Brochure all for $33.50.  If you have not yet used one of these kits, they are a MUST have. Especially for anyone who is short on time!  The brochure gives you all the cutting instructions for making a 2 page layout or a stack of cards. PLUS you have product left over for more.  With a bit of extra paper, you can go online and make the great bonus project of a 6x6 mini album.  I am SO doing this- how adorable!

Here is some examples of what you would get with the kit and what you can make with the papers.  For the flyer (first image) if you click on it then click again it will get bigger- I tested it and it worked for me anyway!


Here is a card which Krista, my Upline, created while at Convention.  She gave me permission to share this with you all.  If you don't follow her blog already, you can check her out here.

And here is Krista's card

The paper is the new Sonoma paper just released.

Anyhow- there is a intro to some of my favs from the new IB.  If you don't have a copy yet, let me know and I'll get one to you!  I can't tell you how many times I've already looked through mine!  And don't forget those great promotions for the August Stamp of the Month and for National Stamping Month.  Well looky that!  I just went through my blog to put a linkhere for you to the post where I blogged about the sales... and I HAVEN'T blogged about the sales!  It was just in my Monthly newsletter (see why you need to subscribe! LOL).  So... I guess I have a topic for another post!  If only I can remember...

Until then, happy Scrappin'!


Upcoming Events for Cardmaking and Scrapbooking

Hi all!
So many fun events are coming up!  I wanted to share some with you that my Upline, Krista, is running. 

Up at the top you will see a menu bar now which includes my Calendar.  Be sure to keep your eyes on there for events that are coming up. 

This month on Aug 27th Krista is having a Card Making workshop using her new Cricut cartridge that is paired with CTMH.  I'll be attending- if you are interested be sure to let her know!  Or let me know!  You can see some of the details on my calendar when you click on the date.  Or go to Krisa's blog here.

Also although it's down the road, anyone who wants to have some good scrapbooking time will want to keep their calendar free for her All day Crop in October.  Again, the details can be found on my calendar.  The date for this event is
Saturday October 22nd.

Let me know if you'll be joining me for any of these events!  Can't wait!
Happy Scrappin'!

Tuesday, August 9, 2011

Scrappin' an image

Hi there!
Oh how I will miss the trailer- if for no other reason than because I have time to search the net and find all sorts of neat ideas!  My current search has been to find more blogs which use the Silhouette, a machine I own similar to the Cricut but you can do a lot of stuff yourself and you save everything on your computer instead of using cartridges.  Anyway- from hopping from blog to blog I came across a blog for Kelly Purkey.  She is one creative gal!!

On her blog (which you can access here ) she has a tutorial on how to make a map for your scrapbooking page.  I thought this is such a neat idea and you could use it for so many things.  You would want to be sure the image you are scrapping is not too complicated and that you could see the imagine without details- so you'd want it to be recognizable just with the outline- since you will be filling it in with paper.  But how fun! I can't wait to try this!

To help you understand what I'm talking about, here is one of the pictures she has on her blog
Isn't that neat?!  If you try this, be sure to send me a picture!  I'd love to see what you are creating!  And be sure to check out and follow Kelly's blog!  Happy Scrappin'!

Monday, August 8, 2011

Have you seen all the new stuff on my blog?!

Hi there!
So- I hope you have noticed- I have been adding a LOT to my blog! I'm so excited!  My hubby, 3 kids and I have been at our trailer since June 29th.  Al and I both work from home so we are blessed with the opportunity to work from- wherever!  So in the summer we get away and come here and we focus on family time and work.  I get SO much more done than I do at home!  And this summer I really wanted to focus on getting my blog and such set up while I had some time!  Which is why I am so excited! 

For this post, I wanted to point out some of the new features for you to ensure you didn't miss anything!  So here goes!

First, let's start with some of the regular posts I will be doing.  Tuesday's will be
3 T Tuesdays- Tips, Techniques or Tools
What does this mean?  Well, there are so many great things to share- I have lots of tips and techniques to show you for card making and scrapbooking, plus there are lots of products I just LOVE, most of which will make your crafting a lot easier!  With the new Idea Book just coming out, the number of tools and products I can show you are plentiful!  So every Tuesday I will do a special post with one of these "T's".

Saturday will be...
Scrappin' Simply Spotlight!
You may have already experienced this as I had one last week where I focused on work that Jayma does.  Those who know me know I am a promoter of momprenewers and small businesses.  Also I have been inspired by so many blogs and get so much info from them.  So Saturday's I will be spotlighting a special blog so you all can be inspired too.

I am very proud of myself as I had done some research and got some great detailed info from Heather's blog on how to make blog buttons (see the instructions on her blog here) And voila- I made a badge to give to those who I spotlight if they want to post it on their site!  Yay me!  If you know of a blog you think deserves to be in the spotlight, feel free to send the details along!

Now- along the right margin you will see a lot of the new stuff I have added. The first is that blog button I just mentioned- yup, I did that! With Heather's help!

Next you will see the "Follow by Email" area- so if you are like me and like the posts from your favourite bloggers to come to your inbox- just enter your address here and it will happen!  I LOVE this feature on blogs so I wanted to offer it as well!

The next item you can read and learn more about me... and there are a few places like that on the menu. 

The other new item is the "Subscribe to my Monthly Newsletter".  I just created my first newsletter this month!  It went out last week to those who I thought would enjoy getting it.  If you would like to receive it, just click the link!  I will not send more than 1 newsletter a month so I promise not to overwhelm your inbox.  If you missed the first one and would like one, just email me at scrappinsimply@gmail.com and I will forward you a copy.

So- there is a little tour through my blog!  I hope you are enjoying it!  Be sure to let me know if there is anything YOU would like to see! 
Have a wonderful day!  Happy Scrappin'!

Thursday, August 4, 2011

The FIRST Scrappin' Simply Spotlight

There are SO many creative people out there.  And no one is as kind with sharing their tips and tricks as Close to my Heart consultants!  I am always amazed by this group of crafters!  So, in honour of all those sharing their craftiness with me, I have decided to start this spotlight of inspiration.  Each week I will pick a new blog to spotlight.  For my readers, you will be introduced to some of my favourite blogs I follow.  Most will be papercrafting but there will be others as well.  After all, anyone who knows me knows I like to support all those hard working businesses out there- especially the home based ones!

For my first Scrappin' Simply Spotlight, I'd like to shine it on....

Jayma Malme and her Playing with Paper blog

Her works is just amazing!  Here is a sample of something I created based on the Name Frames I saw on her site:


This name frame is something I made for Kaylee's teacher for her year end/ maternity gift.  I saw the idea on Jayma's blog and knew I just HAD to make one!  Luckily I know a lot of pregnant people!  It was actually VERY easy to make as amazing Jayma gave all the dimensions on her blog!  The hardest part was picking what paper and embellishments to use!  Well- and getting out my supplies.  Oh how I dream for a crafting room!  Anyway- this family hadn't settled on a name yet for the baby but knew they were having a girl and with some investigation work I found out the colours for the baby's room was pink and white.  I incorporated some green and brown and well to bring in some other colours.  I was very happy with how it turned out and the family was thrilled as well! 

Be sure to visit Jayma's blog to see all of her amazing work.  Connect with her blog here to find the instructions for this piece- but don't stop there! She is someone you MUST follow!  I follow her blog with my email so I never miss a post! My in-box is jammed pack with ideas I have gotten from her!  Now go check out her blog, get inspired, and get Scrappin'!

Wednesday, August 3, 2011

New Facebook Page address!

Wahoo- I have 25 "likes" on my facebook page and now have a smaller URL! I'm SO excited!  Although small, this was a goal of mine! 

If you haven't done so yet, visit my facebook page at www.facebook.com/scrappinsimply or click here.  Be sure to share it with friends and family so they too can get tips, techniques and inspiration for scrapbooking and card making. 

I have lots of pictures to upload but being at my trailer, my internet is slow.  We will be back next week and I'll start showing some samples then.

Thanks to all my followers!  Keep it coming!